
Blog
A surgical instrument trolley only works well when every item has a reason to be there. In operating rooms, outpatient procedure rooms, emergency departments, and dressing areas, a clear trolley layout helps staff find instruments faster, protect clean items from contamination, and reset the work area without wasted movement.
The best surgical instrument trolley layout starts with the procedure sequence. Before arranging trays, bowls, dressings, forceps, scissors, suction accessories, or disposal supplies, map the work in the order the team will actually use it: preparation, sterile opening, instrument handling, sharps control, waste removal, wipe-down, and restocking.
This matters because a crowded trolley can look prepared while still slowing the team down. If the top surface mixes sterile supplies, backup instruments, packaging waste, and handwritten notes, staff have to search and sort while the patient is waiting. A good setup removes that friction.
For most teams, the practical goal is simple: high-use items stay closest to the working side, backup items stay grouped but separate, and anything dirty or discarded moves away from clean supplies as soon as possible.
A trolley should make contamination control visible. Use zones so staff can understand the surface at a glance. One area can hold sterile packs or a sterile tray after opening. Another can hold clean but non-sterile support items such as tape, labels, wrapped gauze, or unopened dressings. Used items need a clearly separate path to a basin, disposal container, or reprocessing collection point.
CDC guidance on disinfection and sterilization stresses that medical devices need appropriate cleaning, packaging, storage, and handling to prevent recontamination after processing. The trolley is not a sterilizer, and it should not be treated like one. Its job is to support the clean-to-used workflow so processed instruments and sterile supplies are handled with fewer unnecessary touches.
If your facility uses color-coded trays or labels, keep the same logic on the trolley. Clean supplies should never have to cross over used instruments, and sharps should never sit loose on a busy work surface.
The top shelf is premium space. Reserve it for the items the clinician reaches for first and most often. That usually includes the main sterile tray or instrument set, a small number of procedure-specific tools, and a controlled area for sterile consumables after opening.
Avoid using the top surface as a storage shelf for every possible item. Extra stock belongs below, in a drawer, or on a second support cart. The more objects on the top level, the harder it becomes to see what is missing and the easier it is to contaminate clean materials during repositioning.
A useful rule for daily work: if the item is not needed in the next few minutes, it probably should not be on the immediate working surface.
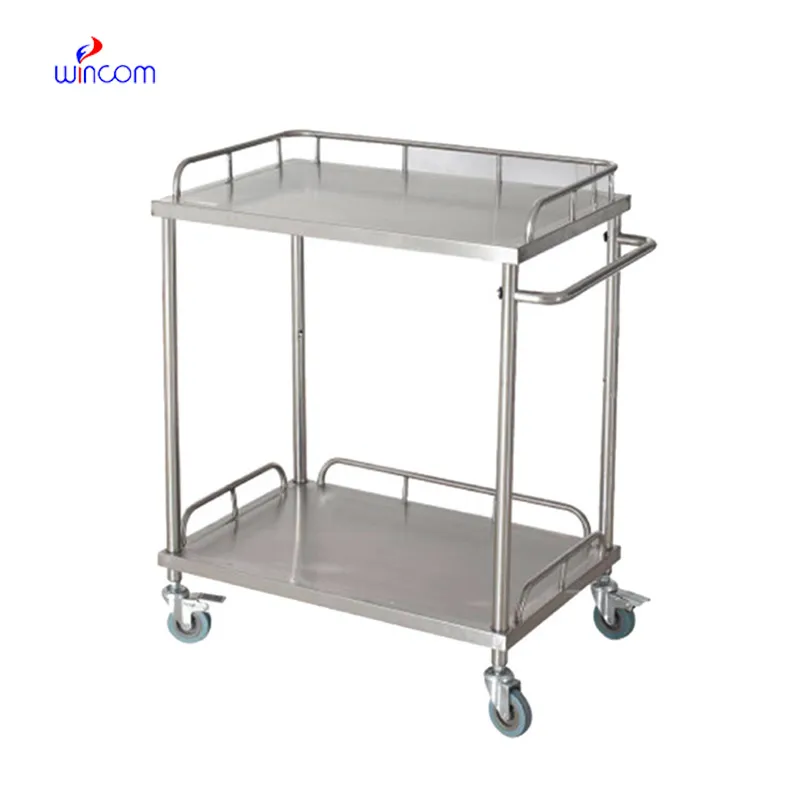
The lower shelf is better for unopened packs, replacement dressings, extra gloves, protective covers, cleaning wipes approved by the facility, and restocking materials. These items are important, but they should not compete with active procedure tools.
Keep lower-shelf items in bins or trays rather than loose stacks. Loose stock shifts when the trolley moves, and that makes inventory checks slower. Bins also make it easier to remove expired or damaged packaging during routine checks.
For procedure rooms with repeated case turnover, create a minimum and maximum stock level. When every trolley is stocked to the same level, staff do not have to guess whether the next room is ready.
Instrument grouping should follow use, not habit. Put cutting instruments together, grasping and holding instruments together, dressing instruments together, and measuring or probing instruments together when the procedure calls for them. If a set includes rarely used backup tools, place them behind the primary group or in a clearly marked secondary tray.
This approach reduces small delays. Staff should not have to separate scissors from forceps in the middle of a dressing change or minor procedure. It also supports faster post-procedure counts because each group has a predictable place.
For mixed-use trolleys, label removable trays by procedure type, such as wound dressing, suture removal, catheter support, or minor treatment. The trolley can then change role without becoming a random storage cart.
Sharps safety is easier when the disposal route is planned before the procedure starts. Place sharps containers or approved receiving trays where they can be reached without crossing clean supplies. Used blades, needles, and contaminated tips should have one direction of travel: away from the clean side and into the correct container.
Waste should follow the same logic. Packaging waste can quickly take over a trolley if it has no assigned place. Keep a small, clearly separate waste point nearby so staff are not tempted to set wrappers beside sterile packs or instruments.
A trolley that handles sharps and waste cleanly is faster to reset and easier to audit.
Labels do not need to be elaborate. They need to be consistent. Mark drawers, bins, and removable trays with plain language: sterile packs, dressing supplies, backup instruments, cleaning supplies, documentation, and used instrument return. If your team works across multiple rooms, use the same wording everywhere.
Date-sensitive supplies need extra attention. Put older stock at the front and newer stock behind it. During restocking, check packaging integrity and expiry dates before items go back on the trolley.
For multilingual teams or high-turnover departments, add simple icons or color bands. The goal is not decoration. The goal is fewer questions during a busy shift.
After a procedure, the trolley should return to a known baseline. Remove used instruments according to your facility's reprocessing pathway, discard waste, clean contact surfaces with the approved product, allow the required wet contact time, and restock only after the surface is ready.
Do not restock clean supplies onto a surface that still holds used items or wet residue unless your facility procedure allows it. This is where small shortcuts create larger problems: missing items, damaged packaging, and clean supplies placed too close to contaminated materials.
A reset checklist helps. It should be short enough that staff actually use it: remove, clean, inspect, restock, record.
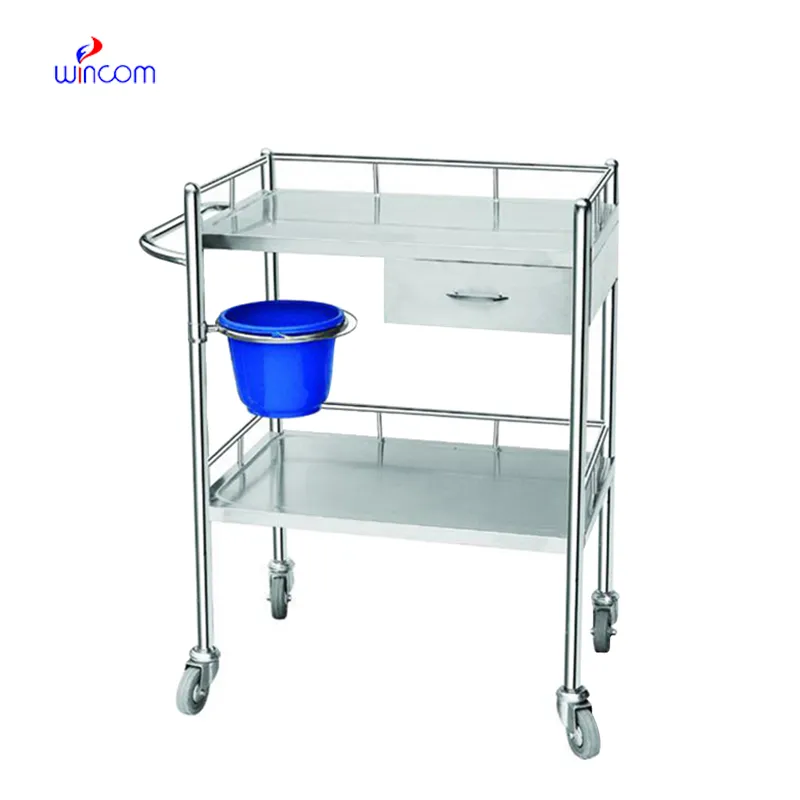
⭐ Recommended Surgical Instrument Trolley | Wincom Dressing Trolley WN120
For facilities that need a compact trolley for dressing, minor treatment, and instrument support, Wincom's Dressing Trolley WN120 gives clinical teams a dedicated mobile work surface for organizing procedure supplies. It fits the buyer logic behind a well-run instrument trolley: separate active-use items from backup stock, keep the surface easy to clean, and support repeatable room turnover.
Because trolley specifications, accessories, and materials can vary by order or market, procurement teams should verify dimensions, shelf structure, wheel configuration, material grade, and packaging details directly before purchase. The useful point is not to buy a trolley by name alone. Match the WN120 to the room layout, procedure type, cleaning protocol, and staff movement pattern.
Wincom also groups medical equipment and hospital furniture through its website, including instrument trolley options for clinics, hospitals, and distributors. Buyers comparing models can review the Wincom instrument trolley category and then confirm the final configuration through the product inquiry process.
Use this practical checklist before a procedure list, outpatient shift, or dressing round.
| Zone | What to place there | Control point |
|---|---|---|
| Top surface | Primary tray, high-use instruments, sterile consumables after opening | Keep it uncluttered and procedure-specific |
| Clean support area | Unopened dressings, tape, labels, gloves, small accessories | Separate clean items from used instruments |
| Lower shelf or storage | Backup stock, replacement packs, restocking supplies | Use bins and clear labels |
| Sharps route | Approved sharps container or receiving tray | Place it away from sterile supplies |
| Used instrument route | Return basin, covered container, or facility-approved collection point | Do not mix used items with clean stock |
| Reset items | Approved wipes, checklist, stock level guide | Clean first, then restock |
When purchasing surgical instrument trolleys in quantity, the cheapest unit is not always the most efficient one. A trolley that is hard to clean, difficult to steer, or too small for common procedure packs will cost time every day.
Buyers should compare surface material, corrosion resistance, wheel quality, brake stability, shelf height, load requirements, packaging for export, spare parts availability, and whether the supplier can support consistent repeat orders. For distributors, consistent naming, cartons, and documentation also matter because the product has to move through sales, warehousing, and installation without confusion.
Wincom can be positioned as a sourcing option for medical and hospital furniture buyers who want to evaluate a dedicated dressing trolley alongside broader equipment needs. Teams can start with the Dressing Trolley WN120 product, compare it with related trolley models, and use a specification sheet request to confirm the details that affect cleaning, mobility, and daily use.
The most common trolley problem is overstocking. Staff add supplies after one difficult case, then add more after another, until the trolley becomes a rolling storage cabinet. That feels safe, but it hides missing critical items and increases the time needed to clean the trolley.
Another mistake is mixing procedure types without clear trays. If the same trolley supports dressing changes, minor treatment, and general instrument transfer, removable task trays are usually better than one large mixed layout.
The last mistake is treating cleaning as a final housekeeping step instead of part of the workflow. The trolley should be reset before it disappears into the next room. Otherwise, the next team inherits someone else's uncertainty.
Arrange it by workflow. Keep the active procedure tray and high-use instruments on the top surface, place backup stock below, and give used instruments and sharps a separate route away from clean supplies.
It can support minor procedures, dressing changes, and instrument organization when it matches the facility's workflow and cleaning protocol. For operating room use, buyers should verify material, dimensions, load capacity, mobility, and infection-control requirements before selection.
Avoid loose backup stock, paperwork, personal items, mixed waste, and rarely used tools. The top shelf should stay focused on the current procedure.
Clean and reset it after each use or according to the facility's written procedure. Contact surfaces should be treated with approved products and allowed the required contact time.
Confirm dimensions, shelf layout, material, castor and brake design, load requirements, packaging, available accessories, warranty terms, and whether the model fits the intended clinical workflow.
Share your room type, procedure use, preferred dimensions, cleaning requirements, and order quantity so Wincom can help confirm whether Dressing Trolley WN120 is the right fit.
A well-organized surgical instrument trolley does not need a complicated system. It needs a clean workflow, clear zones, predictable stock levels, and a reset routine that staff can repeat under pressure. For hospitals, clinics, and distributors reviewing trolley options, Wincom offers a relevant starting point through its medical equipment and hospital furniture range. To discuss the Dressing Trolley WN120 or request configuration details, use the Wincom contact page and verify the final specification against your facility's procedure and cleaning requirements.
E-mail: [email protected]
Tel: +86-731-84176622
+86-731-84136655
Address: Rm.1507,Xinsancheng Plaza. No.58, Renmin Road(E),Changsha,Hunan,China

 af
af
 es
es
 ar
ar
 tr
tr
 sw
sw
 pt
pt
 th
th
 ur
ur
 bn
bn
 ne
ne
 vi
vi
 km
km
 lo
lo
 de
de
 ru
ru
 fi
fi
 nl
nl
 fa
fa
 fr
fr
 ko
ko


